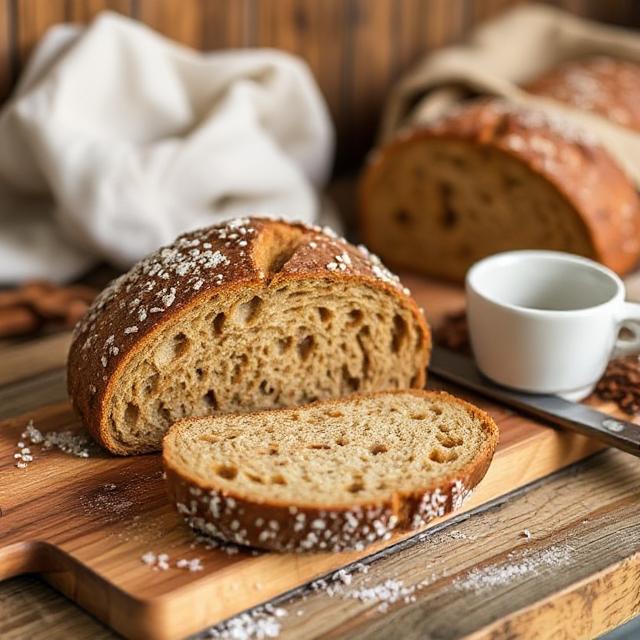
Bread has been a staple in human diets for thousands of years, symbolizing nourishment, community, and tradition. Among the many varieties of bread, Bigwood Bread stands out for its hearty texture, rich flavor, and satisfying crust. Originating from rustic baking traditions, Bigwood Bread is a beloved choice for home bakers seeking to craft something both wholesome and artisanal. If you’re eager to bring the aroma of freshly baked bread into your home, this comprehensive guide will walk you through every step to make authentic Bigwood Bread from scratch.
What Is Bigwood Bread?
Bigwood Bread is a rustic, artisan-style loaf characterized by its thick crust, chewy crumb, and robust flavor. Typically made with simple ingredients—flour, water, yeast, and salt—it embodies the essence of traditional bread baking. The name “Bigwood Bread” pays homage to its rustic origins, often associated with wood-fired ovens and countryside bakeries.
Ingredients Needed
To make authentic Bigwood Bread, gather the following ingredients:
- 4 cups (500 g) bread flour (preferably high-protein for better gluten development)
- 1 ½ cups (360 ml) cold water
- 1 ½ teaspoons salt
- ½ teaspoon active dry yeast or instant yeast
- Optional: a tablespoon of malt syrup or honey for flavor and crust color
- Cornmeal or rice flour (for dusting)
Equipment Required
- Large mixing bowl
- Kitchen scale (for precise measurement)
- Dough scraper or spatula
- Kitchen towel or plastic wrap
- Dutch oven or heavy oven-safe pot with lid
- Parchment paper
- Cooling rack
Step 1: Preparing the Dough
a. Activate the Yeast
If using active dry yeast, dissolve it in ¼ cup of warm water (about 110°F/43°C) with a pinch of sugar. Let it sit for 5-10 minutes until frothy. Instant yeast can be mixed directly with flour.
b. Mix the Ingredients
In a large mixing bowl, combine the flour and salt. Create a well in the center and pour in the activated yeast mixture (or sprinkle instant yeast directly). Add the remaining cold water and optional malt syrup or honey.
Using a spatula or your hands, mix until a shaggy dough forms. The dough should be sticky but manageable.
Step 2: Bulk Fermentation and Gluten Development
a. First Rise
Cover the bowl with a damp kitchen towel or plastic wrap. Let it rest at room temperature (around 70°F/21°C) for 12-18 hours. This slow fermentation develops flavor and gluten structure, essential for the bread’s texture.
b. Folding the Dough
During the first few hours, perform a series of stretch-and-folds every 30 minutes for the first 2-3 hours. To do this, gently stretch the dough from one side and fold it over the center. Rotate the bowl and repeat 4 times. This technique enhances gluten development without kneading.
Step 3: Shaping the Dough
After the bulk fermentation, the dough will be bubbly and slightly risen.
a. Prepare for Shaping
Lightly flour a clean surface and a kitchen towel or banneton basket (if available). Gently turn the dough onto the floured surface.
b. Shape the Loaf
Using your hands or a dough scraper, shape the dough into a tight round or oval loaf. Tension is key—stretch the surface of the dough slightly to create a smooth, taut surface.
c. Final Proof
Place the shaped dough on a floured towel or in a proofing basket. Cover loosely and let rise for 1-2 hours at room temperature, or until it has increased in size and passes the “poke test” (indentation slowly springs back).
Step 4: Preparing for Baking
a. Preheat the Oven
Place a Dutch oven or heavy oven-safe pot with its lid inside to preheat at 450°F (230°C) for at least 30 minutes. This mimics a traditional bread oven, creating steam for a crisp crust.
b. Score the Dough
Just before baking, transfer the dough onto a piece of parchment paper. Using a sharp knife or bread lame, score the top of the loaf with 2-3 slashes. This allows the bread to expand properly.
Step 5: Baking the Bigwood Bread
a. Bake with Steam
Carefully remove the preheated Dutch oven from the oven. Using the parchment paper, lift the dough and place it into the hot vessel. Cover with the lid.
b. Bake
Bake covered for 20-25 minutes. This traps steam, aiding crust development. Then, remove the lid and bake for an additional 15-20 minutes to achieve a deep, golden crust.
c. Check for Doneness
The bread is done when it sounds hollow when tapped on the bottom and has a rich, dark crust. Internal temperature should be around 200°F (93°C).
Step 6: Cooling and Serving
Transfer the baked bread onto a wire rack and let it cool for at least 1 hour before slicing. This resting period allows the crumb to set and prevents it from becoming gummy.
Tips for Success
- Patience is key: The slow fermentation enhances flavor and texture.
- Use quality flour: High-protein bread flour yields better gluten structure.
- Maintain consistent temperature: Keep dough in a warm, draft-free environment during proofing.
- Experiment with add-ins: Incorporate seeds, nuts, or dried herbs for variety.
Troubleshooting Common Issues
- Dense bread: Insufficient fermentation or gluten development. Ensure proper rising times and folding.
- Crust too thick or burnt: Oven temperature too high or baking too long. Adjust baking time and monitor closely.
- Uneven rise: Not enough shaping tension or improper proofing. Practice shaping techniques and proof until dough passes the poke test.
Final Thoughts
Making Bigwood Bread at home is a rewarding process that connects you with centuries-old baking traditions. The key lies in patience, attention to detail, and a willingness to experiment. With practice, you’ll perfect your technique and enjoy the delicious aroma and taste of freshly baked rustic bread right from your own kitchen.
Enjoy baking your homemade Bigwood Bread—it’s a hearty, flavorful loaf that’s perfect for breakfast, sandwiches, or simply savoring with butter and jam. Happy baking!


