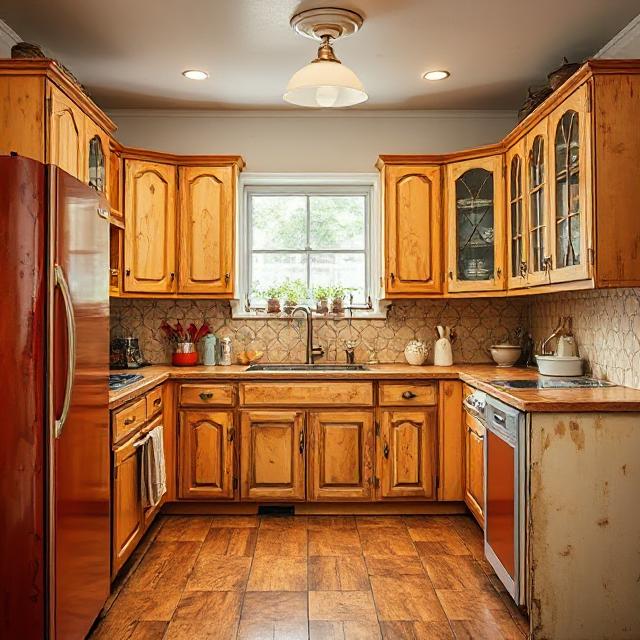
Introduction to Vintage Kitchen Cabinets
Creating vintage kitchen cabinets is a rewarding craft that combines woodworking skills, an eye for design, and a passion for restoring the charm of bygone eras. I embarked on this journey driven by my love for retro aesthetics and the satisfaction of transforming plain furniture into timeless pieces. Here’s a detailed account of how I make vintage kitchen cabinets, from planning to finishing.
1. Planning and Inspiration
My first step is gathering inspiration. I spend hours browsing Vintage Kitchen Cabinets magazines, online galleries, and antique shops to identify styles I love—be it the classic Shaker, farmhouse, or Art Deco influences. I then sketch rough designs, focusing on distinctive features like curved moldings, glass-paneled doors, or decorative hardware.
Next, I measure the space where the cabinets will sit, noting the dimensions of existing elements to ensure a good fit. I also decide on the overall color palette—soft pastels, distressed whites, or bold hues—depending on the Vintage Kitchen Cabinets look I aim to achieve.
2. Selecting Materials
Authentic Vintage Kitchen Cabinets often feature solid wood, such as oak, maple, or pine. I prefer pine for its affordability and ease of working, but I also consider oak for durability. For the cabinet doors, I opt for plywood or solid wood panels, sometimes with beadboard inserts to evoke a classic farmhouse vibe.
Hardware plays a vital role in Vintage Kitchen Cabinets aesthetics. I search for vintage-style knobs, pulls, and hinges—either original pieces from flea markets or reproductions that mimic the era. Using high-quality, period-appropriate hardware adds authenticity to the finished piece.
3. Building the Framework
The construction begins with cutting the basic frame components—side panels, top and bottom panels, and shelves. I use a table saw and miter saw for precise cuts, ensuring all pieces fit snugly.
I assemble the carcass using wood glue and nails or screws, paying close attention to squareness and alignment. Clamping the pieces during glue-up ensures a tight bond. Once assembled, I sand the surfaces smoothly, removing any rough edges and preparing the wood for finishing.
4. Crafting Doors and Drawers
For the doors, I decide whether to use flat panels, raised panels, or beadboard inserts, depending on the Vintage Kitchen Cabinets style desired. Beadboard is a popular choice for farmhouse or cottage styles. I cut the panels to size, then assemble the frames with mortise and tenon joints or pocket screws for strength.
Drawers are constructed with dovetail joints for durability and a classic look. I install drawer slides and ensure smooth operation. For a Vintage Kitchen Cabinets touch, I may add decorative edges or trim to the drawer fronts.
5. Adding Decorative Details
Vintage Kitchen Cabinets often feature decorative moldings, crown moldings, or scalloped edges. I craft these using molding planes or router bits. These details give the cabinets character and authenticity.
I also consider adding glass inserts to the cabinet doors. I cut the glass to size, install glazing points, and seal with putty or trim, creating a display area for vintage dishes or glassware.
6. Finishing Touches: Painting and Distressing
Finishing is where the Vintage Kitchen Cabinets character truly comes alive. I choose a paint or stain that matches the era—distressed whites, pastel greens, or muted blues. I prefer chalk paint for its matte finish and ease of distressing.
After applying the paint or stain, I use fine-grit sandpaper or steel wool to gently sand edges, corners, and raised details, revealing glimpses of the underlying wood or previous layers. This distressed technique gives the cabinets a worn, authentic look.
I also add a clear wax or matte polyurethane topcoat to protect the finish while maintaining the Vintage Kitchen Cabinets feel. Sometimes, I incorporate subtle aging techniques, like adding small dents or chips, to enhance the antique appearance.
7. Hardware Installation
Once the finish is complete and dried thoroughly, I attach the Vintage Kitchen Cabinets hardware. I drill holes carefully to match the hardware mounting points, then secure the knobs, pulls, and hinges. Proper hardware placement ensures both functionality and aesthetic appeal.
8. Installation and Final Adjustments
The last step is installing the cabinets in their designated space. I ensure they are level and securely anchored to the wall. I check all doors and drawers for smooth operation and make any necessary adjustments.
9. Final Inspection and Enjoyment
After installation, I step back to admire my work. The vintage kitchen cabinets now evoke the charm of a different era, blending functionality with nostalgic beauty. Each piece tells a story—of craftsmanship, history, and personal touch.
Conclusion
Making vintage kitchen cabinets is both an art and a craft. It requires patience, attention to detail, and a love for historic design. From selecting the right materials and building with precision to finishing with distressed paint and authentic hardware, every step is essential in creating a piece that captures the timeless charm of vintage kitchens.
Whether you’re a seasoned woodworker or a DIY enthusiast, transforming raw materials into Vintage Kitchen Cabinets-style cabinets is immensely satisfying. It’s a way to preserve history, add character to your home, and enjoy the timeless beauty of craftsmanship.