Introduction to Butt Connectors
When it comes to wiring projects, the right connections can make all the difference. Enter butt connectors—small but mighty components that offer a reliable solution for joining wires together.
Whether you’re tackling a DIY home project or working on automotive repairs, understanding how to use butt connectors effectively is essential.
These handy little devices simplify the process of connecting two pieces of wire, ensuring a strong and secure bond that stands up to wear and tear. But what exactly are they? What types exist? And how do you use them properly?
This guide will walk you through everything you need to know about butt connectors, so you can tackle your wiring tasks with confidence and ease. Let’s dive in!
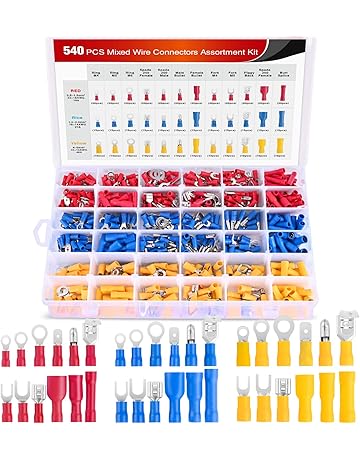
Types of Butt Connectors
Butt connectors come in various types, each designed for specific applications. The most common are standard butt connectors, which work well for general wiring tasks.
Another popular option is heat-shrink butt connectors. These provide extra protection against moisture and environmental factors when heat is applied, creating a tight seal around the connection.
For those looking to ensure a more secure fit, nylon-insulated butt connectors offer enhanced durability. They resist corrosion and wear better than their non-insulated counterparts.
You might encounter crimp-style or solder-type options too. Crimp-style connectors require a simple squeeze with pliers for a solid grip on wires. Solder-type variants involve melting solder to create an electrical bond but demand more skill and tools.
Choosing the right type depends on your project’s demands, whether it’s flexibility, strength, or resistance to elements you need.
Tools Needed for Using Butt Connectors
To work effectively with butt connectors, having the right tools is essential. First on your list should be a wire stripper. This handy tool helps you remove insulation from the ends of wires without damaging them.
A crimping tool is another must-have. It secures the connector to the wire by deforming it around the metal conductor, ensuring a solid connection that can withstand wear and tear.
Don’t overlook a good pair of pliers. They come in handy for gripping and bending wires, making your job easier.
Consider having electrical tape or heat shrink tubing available. These materials add an extra layer of insulation and protection to your connections, preventing moisture ingress and potential shorts.
With these tools at hand, you’ll find working with butt connectors more straightforward and efficient.
Step-by-Step Guide to Using Butt Connectors in Wiring
Start by gathering your materials. You’ll need the butt connectors, wire strippers, and a crimping tool. Having everything on hand makes the process smoother.
Next, prepare your wires. Strip about half an inch of insulation from each end of the wires you want to connect. Be careful not to damage the copper strands inside.
Now it’s time for insertion. Take one stripped wire and insert it into one side of the butt connector. Push until you feel resistance.
Use your crimping tool to secure the connection firmly. Repeat this step with the second wire on the opposite end of the connector.
Once both wires are securely fastened in place, consider insulating them with heat shrink tubing or electrical tape. This extra layer helps protect against moisture and ensures durability in your wiring project.
Tips for Properly Securing and Insulating Butt Connectors
To ensure a reliable connection with butt connectors, start by selecting the right size for your wire gauge. A snug fit is essential for preventing corrosion and maintaining conductivity.
Before crimping, strip the ends of your wires about half an inch. This length allows enough metal contact without risking exposed conductors that can touch each other or short out.
When crimping, use a quality tool designed specifically for this purpose. Apply firm pressure to create a solid bond between the connector and the wire. Check that no copper strands are showing outside of the connector after crimping.
Insulating butt connectors is equally vital. Slide heat shrink tubing over each joint before you connect them. Once secured, apply heat evenly until it shrinks tightly around the connection, providing protection against moisture and abrasion.
Regularly inspect connections in areas prone to movement or vibration to prevent loosening over time.
Common Mistakes to Avoid When Using Butt Connectors
When working with butt connectors, it’s easy to make mistakes that can lead to poor connections. One common error is not stripping the wire insulation correctly. Too much exposure or too little can result in weak connections.
Another frequent issue is failing to use the right size of connector for the wires involved. Mismatched sizes can create loose or overly tight joints, compromising electrical flow.
Neglecting to crimp securely is another pitfall. A weak crimp will lead to a shaky connection that may fail over time due to vibrations and movements.
Skipping heat shrink tubing or insulating tape leaves bare metal exposed. This increases the risk of short circuits and corrosion which affects performance significantly.
Being aware of these pitfalls helps ensure reliable wiring results every time you work with butt connectors.
Advantages and Disadvantages of Butt Connectors
Butt connectors offer a reliable solution for joining wires. Their design ensures solid electrical contact, minimizing the risk of resistance and overheating. This makes them ideal for various applications, from automotive to home wiring.
However, they also come with drawbacks. If not installed correctly, butt connectors can fail over time due to corrosion or loose connections. Environmental factors can further compromise their inty.
Another advantage is ease of use. Even beginners find it simple to connect wires using these connectors. The process usually requires minimal tools and doesn’t demand extensive training.
On the downside, butt connectors may not provide as robust a bond as soldering in some situations. For high-stress environments or critical connections, alternatives might be more suitable in ensuring durability and performance under pressure.
Alternative Options for Connecting Wires
When exploring alternatives to butt connectors, several options come into play. One popular choice is using twist-on wire connectors. These are easy to install and provide a solid connection without the need for crimping tools.
Soldering wires offers another reliable method. By melting solder around the joint, you create a permanent bond that can withstand vibrations and environmental factors. However, this method does require some skill and safety precautions.
Heat shrink tubing is also an effective insulation option after making connections with any of these methods. It ensures protection against moisture and mechanical stress.
Terminal blocks allow for more organized wiring setups, especially in complex systems. They enable easy troubleshooting by providing access points for each wire connection, simplifying maintenance tasks considerably.
Conclusion
Butt connectors are a reliable choice for wiring projects, whether you’re tackling automotive repairs or home electrical work. Their ease of use and strong connections make them popular among DIY enthusiasts and professionals alike.
By understanding the different types available, gathering the necessary tools, and following a straightforward step-by-step process, you can achieve secure connections every time. Remember to pay attention to insulation and proper securing techniques to ensure your connections last.
While butt connectors offer several advantages—including simplicity and durability—it’s essential to be aware of potential pitfalls that could compromise your project. Avoid common mistakes by adhering closely to best practices in installation.
If you find that butt connectors aren’t the right fit for your specific needs, there are alternative options like soldering or using wire nuts. Each method has its pros and cons depending on the application.
Mastering the use of butt connectors will enhance your wiring skills significantly. Embrace this versatile tool in your next project for effective results!